Tuesday, August 30, 2016

Check out what Facebook is on: Facebook Set To Launch Express Wi-Fi Hotspot in Lagos

The social networking giant, Facebook has partnered with one of Nigeria’s Local Internet Service Provider, CoolLink to launch a program called Express Wi-Fi around the city of Lagos. The service was first implemented in India and Nigeria is the second country to get the hotspots.TechSuplex reports that, the service will be launch this week, but already in operational in some part of Lagos such has Ikota Shopping Complex.

Express Wi-Fi by Facebook is a new program that lets phone owners purchase data from local internet service providers. Their data are very cheap, compared to prevailing internet rates. Subscribers can get 5GB monthly for just N1,600. Or 100 MB for just N40.00 for a day.

Users within the Express Wi-Fi coverage area will be able to browse the sites of Facebook Free basic platform for free, but other online activity will be require a fee. The available data plans on Express Wi-Fi are listed below:
Data bundle       Cost       Validity
100MB                 N40        24hrs
300MB                 N110      24hrs
750MB                 N270      7 days
2GB                      N700      7 days
3GB                      N1000   30 days
5GB                      N1600   30 days
As you can see, it is the cheapest data plans ever. Presently, their services will only be available in Lagos and will be deployed across the country eventually, as soon as the first phase which is centred around Lagos is completed.
 
If you’re within a coverage area, you can SignUp for Express Wi-Fi a free 14 days trial here, which gives you free 100MB daily.
Read More »

Glo N0.00kb Unlimited Free Browsing, Now Stable and Fast in Browsing Via New Tweakware VPN3


Glo N0.00kb Unlimited Free Browsing, Now Stable and Fast in Browsing Via New Tweakware VPN


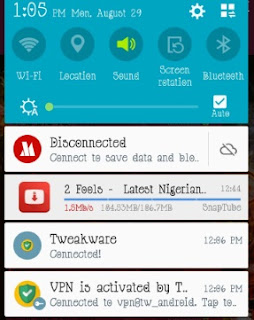
This is one of the everlasting tweak, it has been working for a while, useful for those who have stable Glo 3G network in their area, but the issue of frequent disconnection has been the something bothering us since. Using this new Tweakware v3.5 will make it faster and the simple trick need to be added to your formal setting for the stable connection.

Follow the instruction below to get it rolling;


Make sure your airtime balance is N0.00kb and stable Glo 3G network is very essential, otherwise, you might still experience the disconnecting issues. Also note that you must be on Glo Pay As You Go (PAYU) plan, if you are not yet on the plan, kindly text PAYU to 127. Once you have received a reply that "you are using data Pay As You Go to browse.

APN Settings


» APN: glounlimitedzone
» APN Type: Tick Default & Supl
» Proxy: leave it blank 
» Port: leave it blank


Now, download the latest Tweakware VPN v3.5 from play store here or from the tweakware official website here.

» On the Tweakware VPN, go to Settings
» Click on Bundle Settings
» Tick Enable Bundle Settings
» Select Bundle Settings >> select (NG Glo) 0.0#


Here is the Simple Trick You Need to Apply
» Go back to Settings 
» Click Server Settings
» Click Connection Mode Options
» Now tap on HTTP Host,
» Then clear www.facebook.com and inputredirect.glo.com

Go back to your Tweakware VPN app menu, selectfree server if you don't have premium account yet and hit the connect button.

Note that the Tweakware VPN free servers have daily limits of 300MB, you may need to upgrade to the premium version before you can enjoy unlimited surfing via Tweakware.
Read More »

Monday, August 29, 2016

How to Insert Adsense Inside Posts: After the First Paragraph

Want to know which part of your site or blog will bring you more profit? Add AdSense inside posts and then check out the famous Google AdSense heat map. Recent studies, however, showed that placing AdSense after the first paragraph of a site or blog is one of the best AdSense placement. Unfortunately, the default Blogger platform offered by Google doesn't allow placement of ad after the first paragraph. But because it has become one of the most profitable areas, plenty of webmasters have tried to take advantage of the best AdSense placement. How can you enjoy the same level of profit?

To solve the problem, we will just move the locations of the ads to be displayed by adding JavaScript and DIVs. With the following script, you can easily choose the paragraph or heading after which you want to inject the ad to. This way, you won't have to manually change every post.

adsense inside posts, adsense placement

How to Display AdSense Ads after the First Paragraph in Blogger

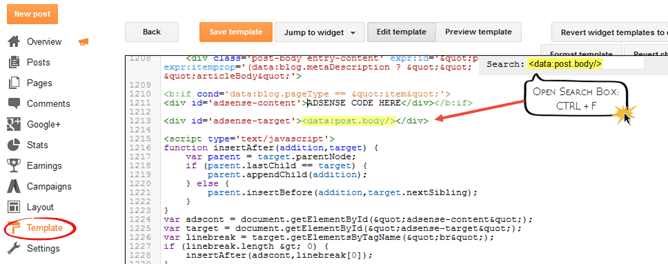
1. Log into your Blogger account, select your blog and click "Template" on the left side. Open the Template editor using the "Edit HTML" button. Once the editor has opened, click anywhere inside the code area and press the CTRL + F keys (or Command + F) on your keyboard to open the editor' search box. Search the following line: 
<data:post.body/>
Note: You will find multiple occurrences of <data:post.body/>, stop at the second one or if you don't see any changes, test the last one.

2. Add the below DIVs in red before and after, like this:
<div id='adsense-target'><data:post.body/></div>
3. Copy the AdSense code that you want to show and use this tool to convert it into plain text. Just above the line that we just found, add the following HTML and replace the "ADSENSE CODE HERE" text with the converted ad code:
<b:if cond='data:blog.pageType == &quot;item&quot;'>
<div id='adsense-content' style="display:block;text-align: center">ADSENSE CODE HERE</div></b:if>
Screenshot:


Align AdSense Left or Right

By default, the Google AdSense ad unit will appear in the middle just after the first paragraph. If you are unhappy with the results and want to wrap text around the ad, you can choose one of the options below:

a) Align AdSense to the left: change <div id='adsense-content' style="display:block;text-align: center">with
<div id='adsense-content' style="display: inline-block;float: left;margin:15px 15px 15px 0px">
After modifying it, the ad will display something like this:

adsense inside posts, adsense placement

b) Align AdSense ad to the right of the content: change <div id='adsense-content' style="display:block;text-align: center">with
<div id='adsense-content' style="display:inline-block;float:right;margin:15px 0px 15px 15px">
4. Finally, right after <div id='adsense-target'><data:post.body/></div> (step 2), add this script:
<script type='text/javascript'>
function insertAfter(addition,target) {
var parent = target.parentNode;
if (parent.lastChild == target) {
parent.appendChild(addition);
} else {
parent.insertBefore(addition,target.nextSibling);
}
}
var adscont = document.getElementById(&quot;adsense-content&quot;);
var target = document.getElementById(&quot;adsense-target&quot;);
var linebreak = target.getElementsByTagName(&quot;br&quot;);
if (linebreak.length &gt; 0){
insertAfter(adscont,linebreak[0]);
}
</script>
Note:
- To insert the ad after the second paragraph, change "0" from the line in red with "2".
- If you want to put AdSense just below the heading h2 or heading h3 of a post, replace br from &quot;br&quot; with h2 orh3

5. Click "Save template" to save the changes and you're done.

With this trick, you can insert AdSense after the first paragraph automatically in Blogger with ease. Now it's your turn to decide which format works best on your site.
Read More »

Sunday, August 28, 2016

Detailed Tutorial On How To Root And Port TWRP Recovery On Infinix Hot S X521

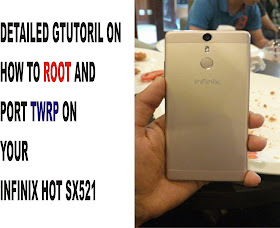
As we all know, recently, Infinix mobility launched their recent device named the Infinix hot S and so far the device has been amazing along with its jaw dropping specs, this device came with android 6.0 out of the box along with a biometric finger print scanner, so today I will be giving a step by step tutorial on how to root and port TWRP to the infinix hot S X521. now this tutorial would not have been possible without thehovatek team, so we say a big thank you to them. 

root and port twrp to the infinix hot S X521
I am sure quite a number of us have started using this device, this tutorial is simply for those who have interest in rooting their android devices and also porting of twrp so as to enable them make a backup and also flash custom ROMs to their infinix X521 devices.

Disclaimerthis site and its developers are not responsible if you should brick your phone in the process, ensure you are conversant with flashing of TWRP and SP Flash Tool before carrying out this process.


Requirements

USB Cable to connect your device to PC 
Download SP Flash Tool
Download Recovery.img for Infinix hot S[you can google how to install it just incase you don't]
Download VCOM drivers

How to port TWRP recovery to Infinix Hot S X521

-Before we begin, it is essential we download and extracted the files provided above.

-after which you locate the folder you extracted the SP flash tool to, it should look like "open flash_tool.exe" and launch it,

-Once the SPflash tool is done loading, click on the download/broowse file then locate and select this scatter fileMT6753_Android_Scatter.exe.

-Now power off your phone, click on "download" tab in the SP flash tool and after which connect your device via USB cable to PC.

-While flashing is in process, do not tamper nor disconnect the USB connection while flashing is still in progress

-Once the flashing process is done, you will see a green good mark symbol like the one in the caption below
step by step tutorial on how to root and port TWRP to the infinix hot S X521

-Once done you disconnect your device from the USB cable and boot into TWRP recovery by pressing and holding volume down + power button simultaneously for 5secs.

Congratulations! you have successfully ported twrp to your Infinix Hot S

How to root Infinix Hot S X521

-Firstly before anything, we have to download superSU file and move it into the internal storage of your infinix hot s (don't place it in any folder at all, just in your internal memory)

-After which, switch off your android device and boot it into TWRP recovery mode by pressing and holding volume down + power button simultaneously.

-While in the recovery main menu, select Install, then locate and select the superSU file you placed in the root of your internal memory, select yes to flash.

-Once the flashing process is completed, go back to the recovery main menu and click on "reboot".
step by step tutorial on how to root and port TWRP to the infinix hot S X521

-Congratulations! you have successfully rooted your Infinix hot S X521, you can confirm your root status by simply downloading root checker from playstore.

If you do have any feedback whatsoever, do make use of the comment box below and I will get back to you shortly. 
Read More »

Download:Pes 2017 ISO PPSSPP Game For All Android Phone With Password For Unlocking


the pes 2017 for PPSSPP went online few hours ago and people have been downloading while some are having difficulty saying it has been passworded, so I have decided to make available for the interested parties, this version of pes 2017.iso ppsspp download link, the pets 2017 supercedes its predecessors and it also comes with very cool features and game changer in the gaming experience.
pes 2017.iso ppsspp download link

Features of pes 2017 for android
-improved goal tending
-improved passing
-improved touch ball control
-and many more fascinating features.

Requirements
below is the available emulators required to run a PPSSPP game on any android device
-Download PPSSPP gold

Screenshots from pes 2017.iso ppsspp
pes 2017.iso ppsspp download link


How to install pes 2016 ISO PPSSPP game on android


-first before we begin, you will need to download and install pes 2017 ISO from the link provided below,

-once installed, download and install PPSSPP gold from the link above.

-after which you move the downloaded Pes 2017.iso to your android SD card >>PSP>>GAME folder.

-after which you launch the PPSSPP gold which you downloaded from the above link and click on the option "find games" input pes 2016 and tap on it .

Password used to unlock pes 2017 iso file
Password; PESFUXION2016-17

Download pes 2017.iso ppsspp game for android

Do use the comment box for for your feedback, and I will be in touch shortly.

Read More »

Checkout: Glo and Etisalat Unlimited Free Browsing With 0.0k Via QueenCee VPN

I know you guys are still flexing with Glo and etisalat N0.0kb free browsing, but the issue of frequent disconnection and the Glo poor network strength are the major concerned, even with the Terminal Emulator, the connection still not stable. I'm glad to inform you that we have got a perfect solution to the annoying disconnection issue via the new VPN calledQueenCee.
Checkout: Glo and Etisalat Unlimited Free Browsing With 0.0k Via QueenCee VPN

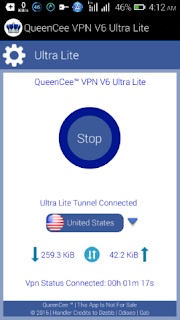
You might have heard or seen someone using this useful internet network tool (an application) called QueenCee or maybe you already have it installed on your smartphone. QueenCee VPN is mainly a network bypassing tool just like the Psiphon. It is designed in such a way that it evades internet censorship.

» For steady connection, download QueenCee VPN 6 Ultra Lite - Download it here 

Globacom Unlimited Free browsing Setting
Make sure your airtime balance is N0.00kb and stable Glo 3G network is very essential, otherwise, you might still experience the disconnecting issues. Also note that you must be on Glo Pay As You Go (PAYU) plan, if you are not yet on the plan, kindly text PAYU to 127. Once you have received a reply that "you are using data Pay As You Go to browse. Then you follow the settings below. 
 
APN Settings
Use any of this APN
» glosecure
» glounlimitedzone
» gloflat


Launch Psiphon Handler, in the handler menu:  
» Front Query: redirect.global.com
» Back Query: %3a@redirect.glo.com
» Proxy Server Type: Real Host
» Proxy Server: redirect.glo.com
» Real Proxy Server Type: default
» Port: 8080
» Hit the Save button
» Immediately you click save, a pop up message will appear requesting to use Tunnel whole device, just tap on the option to Tunnel Whole Device and it will take you to the next phase 
» Choose the Option Menu
» Under this Option menu, you will see Select Region, tap and select  Netherlands   

» Go to your More Option settings and untick connect through HTTP Proxy  
» Go back now to the main page of theQueenCee VPN and tap the start button below, wait for few seconds for it to Connect. Then, fire up any browser and any other apps. 

Here is another Glo working setting, if the first one doesn't work for you, try this; 
» Tick Remove Port
» Proxy Type: Real host
» Proxy Server: redirect.glo.com
» Real Proxy Type: Default or HTTP 
» Real Proxy Port: 80
» Hit the Save button
» Immediately you click save, a pop up message will appear requesting to use Tunnel whole device, just tap on the option to Tunnel Whole Device and it will take you to the next phase 
» Choose the Option Menu
» Under this Option menu, you will see Select Region, tap and select  United State   

» Go to your More Option settings and untick connect through HTTP Proxy  
» Go back now to the main page of theQueenCee VPN and tap the start button below, wait for few seconds for it to Connect. Then, fire up any browser and any other apps.

Etisalat Unlimited Free browsing Setting
» Use the Etisalat default APN for your phone setting i.e APN should be etisalat and both username and password, leave them empty

Launch Psiphon Handler, in the handler menu:
» Proxy Server Type: Real Host
» Proxy Server: ent.nxtfwd.com/s/d/etisalat_ng#openmodal
» Real Proxy Server Type: Inject
» Real Proxy Server: 10.199.212.2
» Port: 8080
» Hit the Save button
» Immediately you click save, a pop up message will appear requesting to use Tunnel whole device, just tap on the option to Tunnel Whole Device and it will take you to the next phase 
» Choose the Option Menu
» Under this Option menu, you will see Select Region, tap and select  Netherlands   

» Go to your More Option settings and untick connect through HTTP Proxy  
» Go back now to the main page of theQueenCee VPN and tap the start button below, wait for few seconds for it to Connect. Then, fire up any browser and any other apps. 


Note: You may have to wait for about 30 minutes, before the QueenCee will connect. 
Enjoy it while it last.
Read More »

Monday, August 22, 2016

Win Up To N500,000 Cash by Answering a Few Questions


Have you ever won a prize online? Here is a great chance! Participate in Skusat CBT Contest to win N500,000. The 2nd edition of the 2016 Skusat CBT Contest is duly approved and endorsed by the Federal Government of Nigeria via the presiding regulatory body in charge of affinity programs and promotional campaigns.

SKUSAT-CBT-CONTEST


Here is another great opportunity to win cash prizes online as Skusat NG recently increased its grand prize from N300,000 to N500,000 for participants in the 2nd edition of the 2016 Skusat CBT Contest.

Undergraduates seeking cash grants and aspirants that obtained a score of 180 and above in the last UTME exercise can apply for this program. This is open till September 2nd.

Successful applicants will be rewarded in the forthcoming intuitive test that would be taken online; with a sum of N500,000 cash and also; sub-grants of N100,000, N50,000 and N10,000 to other category of applicants who attain specific grades as outlined in the registration guideline.
Skusat CBT Contest – Eligibility.


    Applicants must not be below age 16.
    400Level students and above are not eligible to apply.
    Foreign nationals and expatriates are not eligible to participate.
    Applicants must possess the original copy of the document(s) selected during registration. Before grants can be duly awarded, this will be required for a viable clarification from successful applicants only.


Skusat CBT Contest – Application Instructions.


    An 8-digit AUTHENTICATION ID will be sent to all registered applicants within 24hrs of submitting the application online.
    Ensure you cross-check your details thoroughly before submitting; as the screening procedure will be strict.
    ONLY ELIGIBLE applicants will be required to obtain a Passcode/PIN for the Live Test with N1,000 only after passing the necessary data verifications involved.
    Immediate past beneficiaries are not eligible to apply.
    The Live test which would be taken online on the 17th of September will consist just 50 questions from various academic spheres. So feel free to share this with your friends today.


TO APPLY: Visit www.skusat.com/apply-now

Practice questions have been made available on the platform under the “Pre-Test” page and the page can be accessed with the code: 16647260

To qualify for the N500,000 cash grant, applicant must attain at least 80% cumulative score while the sub-grants of N100,000, N50,000 and N10,000 will be duly disbursed to slated number of applicants that obtain scores within the range of (70 – 79)% , (65 – 69)% and (62 – 64)% respectively.

Successful participants will be awarded on the 23rd of September, 2016.
Authenticity of Skusat CBT Contest.

The 2016 Skusat CBT Contest is duly approved and endorsed by the Federal Government of Nigeria via the presiding regulatory body in charge of affinity programs and promotional campaigns.  The program is AUTHENTIC and also perceived as the most organised online educational reward program so far.

You may view pictures of some previous winners below and the previous national newspaper publications by visiting publications by visitingwww.skusat.com/press-clipping
skusta-cbt-contest-1
skusta-cbt-contest-3
skusta-cbt-contest-2
“Failure will never overtake you if your determination to succeed is strong enough.”
Goodluck.
Read More »
Designed by gendermoment'z Blog